Mumu Emulator’s best settings for Gaming and Max FPS

Mumu is one of the newest Android emulators for gaming out there. It is owned by Netease Inc. This emulator is especially good if you are playing NetEase-made games. Especially since the rise of mobile games like PUBG and Call of Duty Mobile gaming on emulators has become the popular choice for PC gamers who love mobile games. So here is a guide for performance optimization for Mumu Emulator for gaming.
Table of contents
- Mumu Advanced settings
- Optimizing Mumu settings On WINDOWS 10.
So you can change the Mumu Engine settings and the Interface Settings for better performance in gaming.
Mumu Advanced settings

Graphics Rendering Mode = DirectX OR Vulkan
This setting depends on the game you are playing and your GPU. If you have one of the latest GPUs, then use DirectX. With older systems and GPUs, Vulkan works like magic. So use Vulkan if you have an old system or an old laptop.
I recommend testing the FPS for the game you are playing. Some games run better in OpenGL while some run better in DirectX. So it is best to test each game.
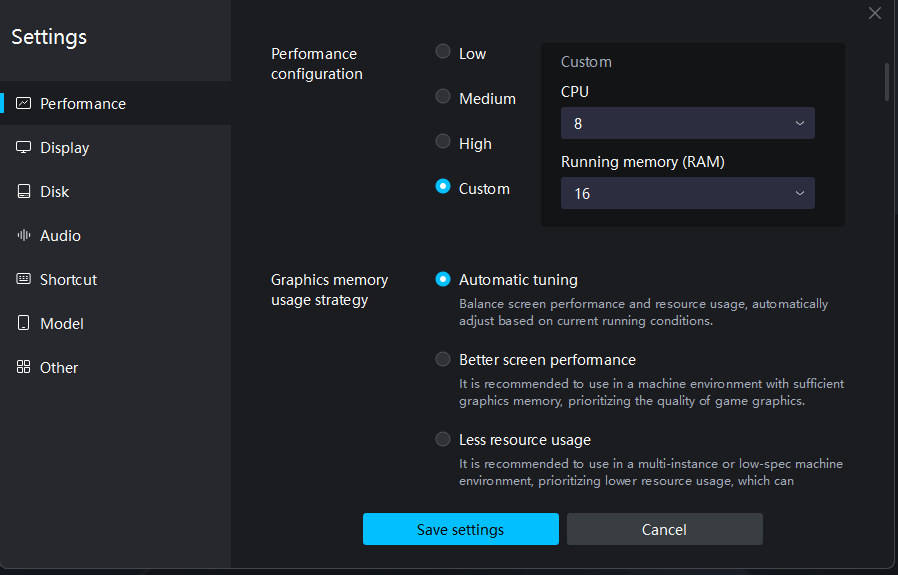
Performance: Custom
CPU Cores
Select the number of CPU cores you have. The number of actual CPU cores. The QUAD core CPU has four cores; the Octa core CPU has 8 etc. So depending on your system specifications make sure to use the maximum number of cores you can allocate to the Mumu emulator for gaming.
Memory
Use all the RAM you have for the Mumu Emulator. Emulators require a lot of RAM, and thus it is recommended that you give 8GB RAM to Mumu for gaming. Generally, all the systems in the market now have 8GB RAM, so I don’t think it will be a problem. If you have more RAM like 32GB or something you can allocate it via the custom option.
Make sure to restart Mumu Emulator to save Changes.
Force use of Discrete Graphics: Enabled
Use this if you have a newer GPU, that too a dedicated one. This setting is recommended for systems with dedicated GPU. You will get a good FPS boost in the Mumu emulator and thus get a better gaming performance overall for all games
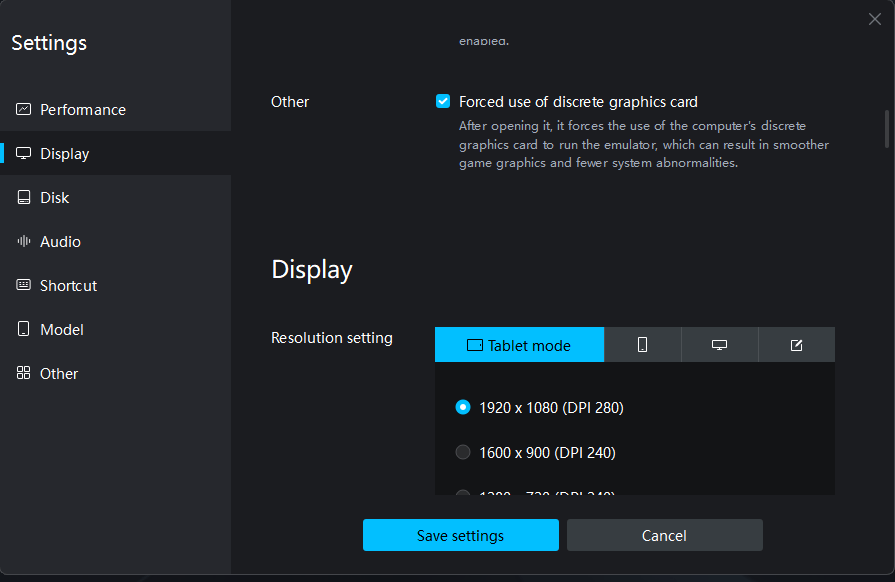
Resolution: Your monitor Resolution
Go with your monitor’s resolution. It is the most recommended Mumu emulator for gaming. The game runs smoother and cleaner when compared to other emulators for gaming.
If you are still getting laggy gameplay then use lower resolution settings. The game will look a bit choppy but if you have a potato PC you don’t really have many options.
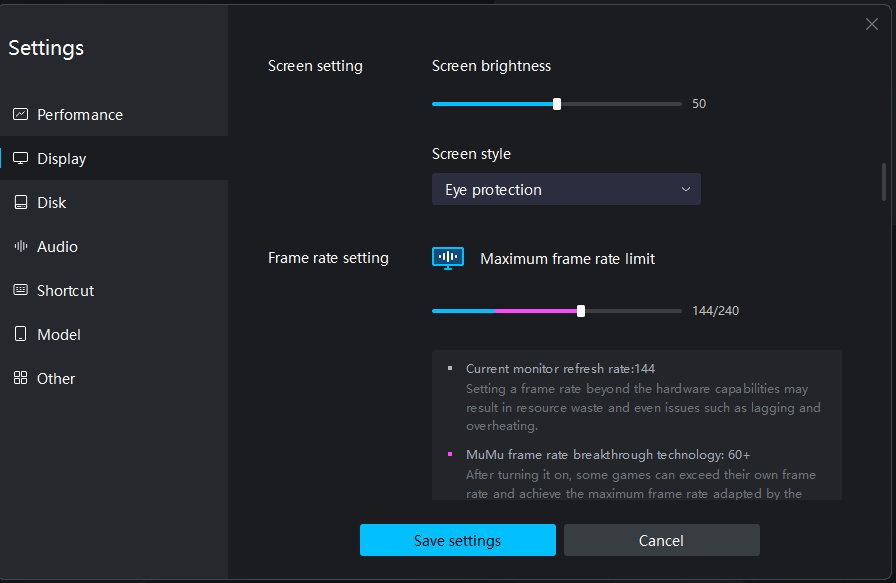
Screen Style: Eye protection
Optional but really useful if you do long hours of gaming sessions. Will help reduce eye strain and make a better gaming experience for you.
FPS: 60 or the same as your monitor refresh rate
60 FPS is the best for most games. You can enjoy truly lag-free gaming and have a great gameplay experience when playing on 60 FPS. If you have a good GPU with 8GB VRAM then you can also select the same fps as your monitor refresh rate for an even better gaming experience.
So if you have a 144hz display then use 144 fps etc.
You can also enable the show fps option so that you can keep track of fps while gaming on the Mumu emulator. This can help you check that your performance optimization for the mumu emulator is actually working as expected.
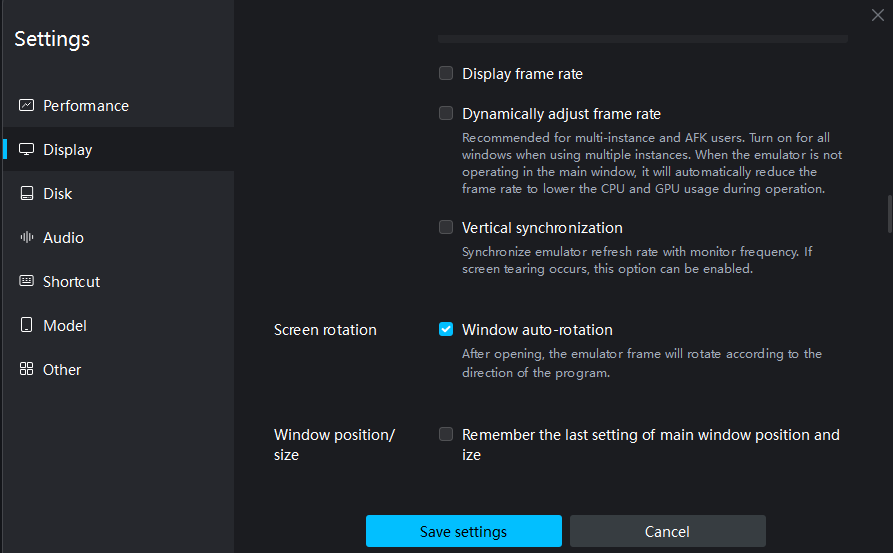
Dynamically Adjust Frame Rate: Disabled
Disable this setting so you don’t get input lag.
Vertical Synchronization: Disabled
Disable this feature. Adds input lag while playing online games. Especially if you are playing Pubg mobile or Call of Duty mobile.
Optimizing Mumu settings On WINDOWS 10.
- Process Priority: High
When you start Mumu do the following:
- Press Alt+Tab.
- Go to the desktop.
- Start Task Manager.
- Find the Process related to Mumu
- Set Its Priority as HIGH.
The image below shows how you can do it:

- Allocated Virtual Memory: Double your actual RAM
Your virtual memory should be double your actual RAM. This memory is used when the system runs out of RAM, so the more you have, the better.
This setting is hidden inside system settings.
Go to control panel>System and security.

System>advanced system settings>

Performance settings>

Advanced>

Virtual memory.
Set it as double your actual RAM. Mine has 8GB RAM, so I used 16000 MB (16 GB)
I have also made an in-depth guide for Windows performance optimization for gaming. Kindly use that to improve your gaming performance even further.
I hope you liked this Mumu Gaming Optimization Guide. Kindly share and support the website. If you have any suggestions for the Mumu Gaming Settings, do mention them in the comment section. See you in-game.
Related Posts:
Gameloop Optimization Guide for Gaming
Bluestacks Optimization Guide for Gaming
LD Player Optimization Guide for Gaming