
How to Create a 1v1 Match in CS2
Want to improve your skills or duel a friend? Here’s how to host your own 1v1 in CS2 with ease.
One-on-one duels in Counter-Strike 2 are perfect for sharpening your aim, practicing movement, or simply settling a friendly rivalry. While it may seem complicated at first, setting up a 1v1 match is straightforward once you know your way around the console and custom maps. This guide walks you through the complete process, from enabling the console to customizing match settings.
NOTE : The person who is going to host the server will have lowest ping!
Step 1: Enable the Developer Console
Before jumping into any setup, you’ll need access to CS2’s developer console, which allows you to input important commands.
Here’s how to enable it:
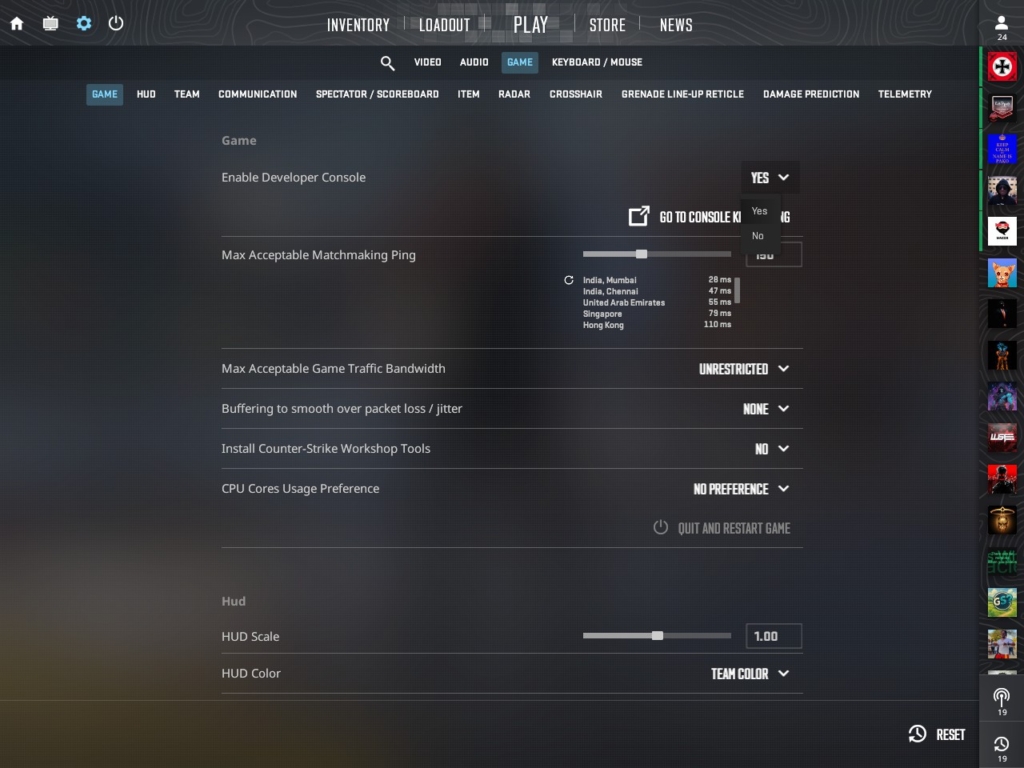
- Click the gear icon on the main menu to open Settings.
- Navigate to the “Game” section.
- Find the “Enable Developer Console (~)” option and toggle it to “Yes.”
- Press the tilde key (~), located beneath the Esc key, to open the console.
This console isn’t just for 1v1 matches, it’s a powerhouse for tweaking crosshairs, performance stats, and more.
Step 2: Launch CS2 and Check for Updates
Ensure your CS2 is updated to the latest version before hosting a match. An outdated game can cause bugs or desync issues.
To verify your game’s integrity:
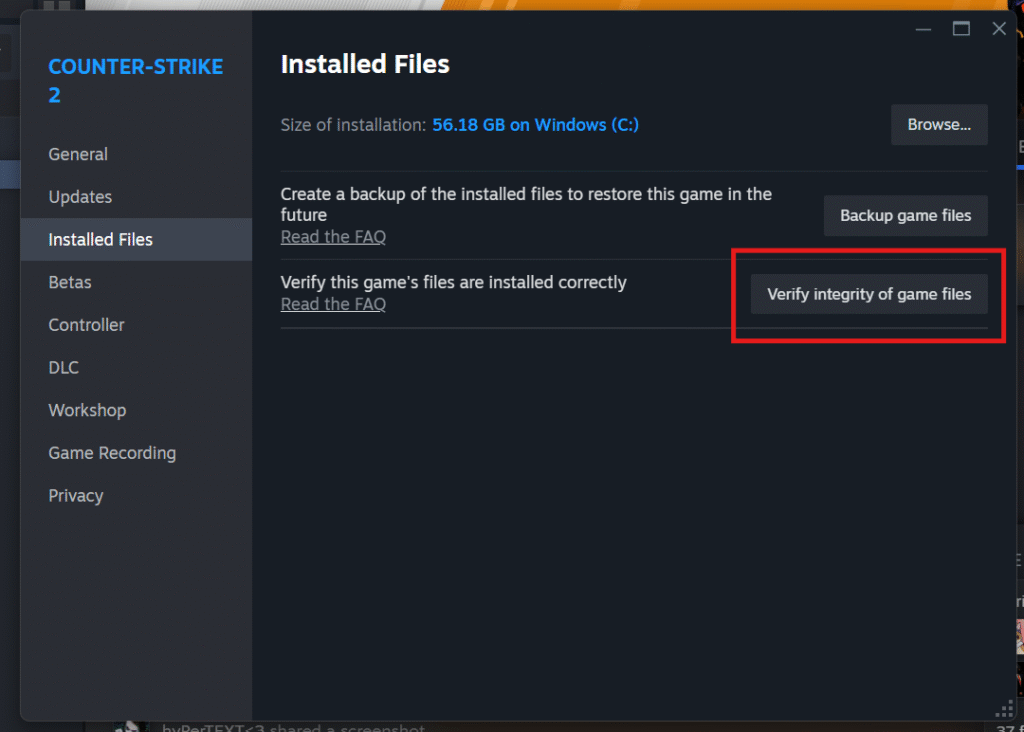
- Right-click on CS2 in your Steam library.
- Select Properties > Local Files > Verify Integrity of Game Files.
This step can prevent mid-game errors and reduce compatibility problems.
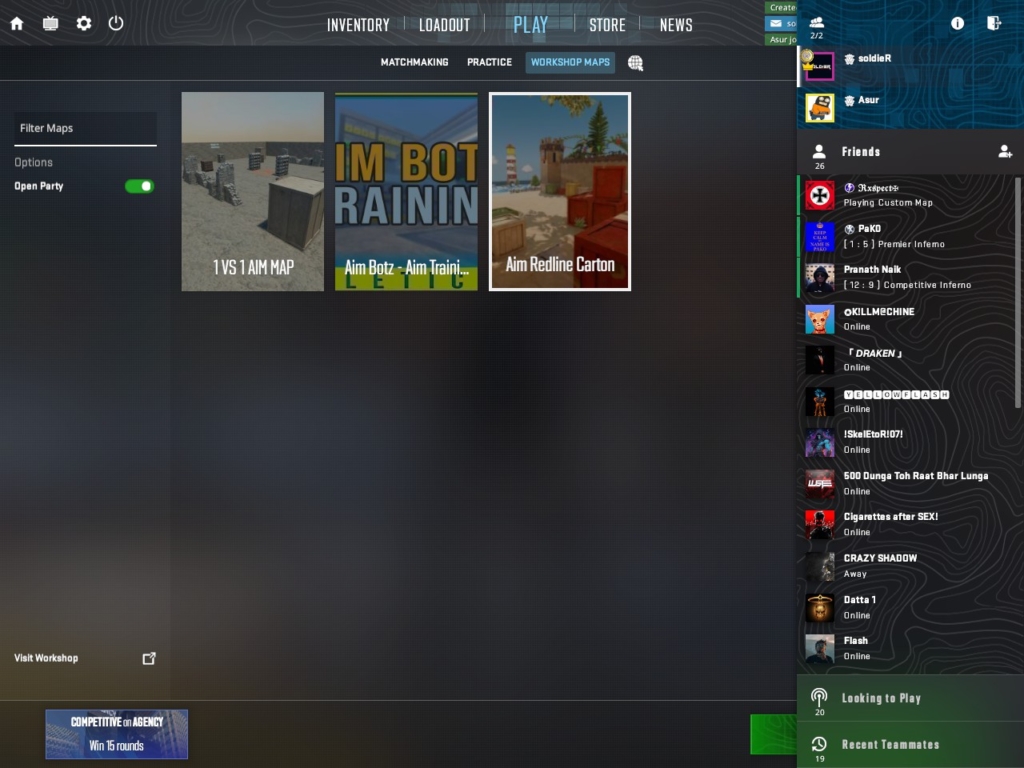
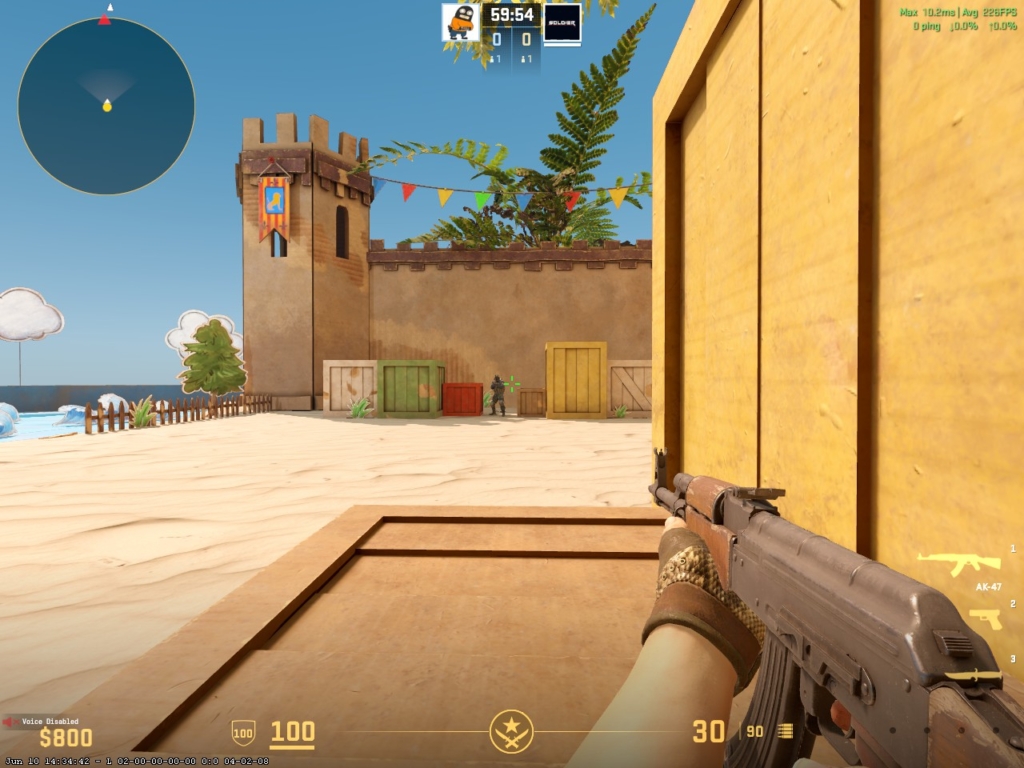
Step 3: Pick a Suitable Map
When dueling one-on-one, a compact and clean map enhances the gameplay experience. Some maps are specifically made for 1v1 combat and aim training.
Visit CS2 Steam Workshop where you can access various community made maps
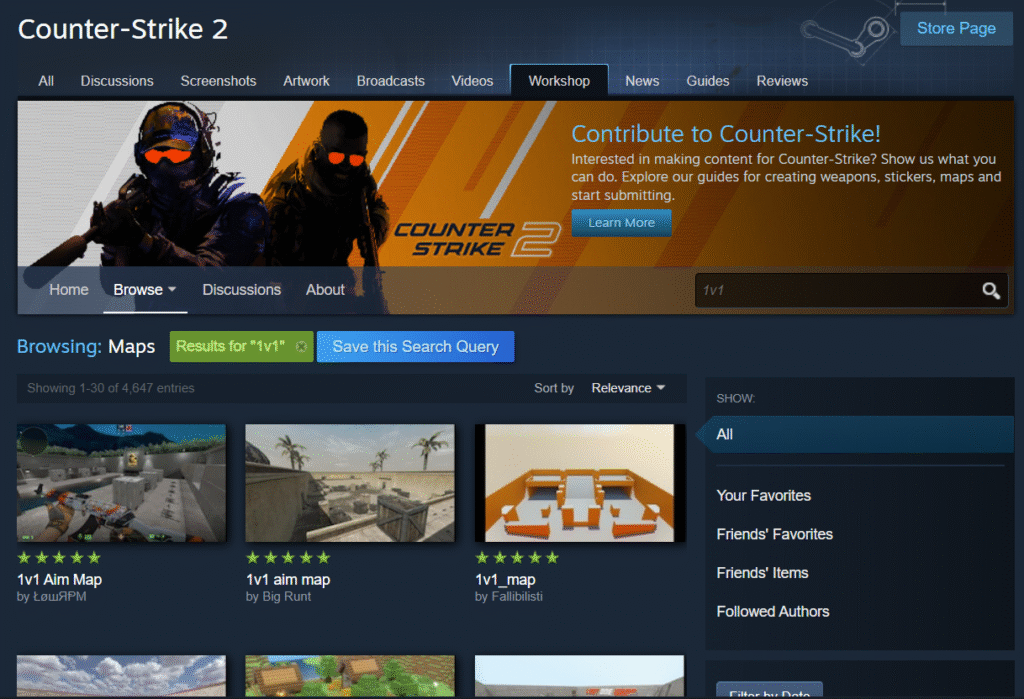
Here are a few highly recommended ones:
- Aim Map – A classic choice for aim-focused duels.
- 1v1 – Remastered – Clean, minimal visuals for uninterrupted gameplay.
- Aim Redline Carton – A fan-favorite reimagined for CS2.
Just Press +Subscribe and wait for it to download in your CS2 Game!
If you want something different, visit the Steam Workshop and search for terms like “1v1” or “aim map.” Subscribe to the maps you like, and CS2 will auto-download them. You’ll find them under the “Workshop Maps” tab in your map selection screen.
Step 4: Invite a Friend and Launch the Map
Option 1: Join via Lobby
The easiest method is to create a lobby and have your friend join you. Choose the map, click “GO,” and the game will launch. If your friend doesn’t have the map, it will automatically download.
Option 2: Connect via Console
If lobby invites don’t work:
- Start the match solo and open the console.
- Type
statusto get the server IP address listed at the top. - Share this IP with your friend.
- They can connect by typing
connect [IP address]into their own console.
When prompted to select the game mode, go with Custom if available. If not, Competitive is the next best choice. Avoid Deathmatch or Casual since they’re not ideal for round-based duels.
Step 5: Apply Your Custom 1v1 Game Configuration
To get the most out of your 1v1 session, use this advanced configuration. Open the developer console and enter the following commands, either line by line or by placing them in a .cfg file:
Go to this path location :
C:\Program Files (x86)\Steam\steamapps\common\Counter-Strike Global Offensive\game\csgo\cfgCreate a .txt file and rename it as 1v1 and use SAVE AS 1v1.cfg
or
Just download from here and paste in the above path
bot_kick;
exec gamemode_competitive;
mp_free_armor 1;
mp_freezetime 3;
mp_weapons_allow_map_placed 1;
mp_humanteam any;
mp_restartgame 1;
mp_round_restart_delay 3;
mp_roundtime 60;
mp_maxrounds 30;
mp_halftime 1;
mp_warmup_end;

sv_infite_ammo 2;
sv_alltalk 1;
sv_deadtalk 1;

mp_restart 2;

clear;
echo ##################################################
echo 1v1 Noobs2pro Config loaded!!!
echo ##################################################
echo mp_t_default_secondary weapon_usp_silencer
echo mp_t_default_primary ""
mp_restart 1
Here’s what this setup does:
- bot_kick: Removes all bots from the server.
- exec gamemode_competitive: Loads the default competitive settings.
- mp_free_armor 1: Automatically gives players armor.
- mp_freezetime 3: Reduces wait time before each round.
- mp_weapons_allow_map_placed 1: Enables use of weapons placed on the map.
- mp_humanteam any: Allows players to join either team freely.
- mp_restartgame 1: Restarts the game to apply all settings.
- mp_round_restart_delay 3: Sets delay before a new round starts.
- mp_roundtime
60: (usemp_roundtime 60for 60-second rounds). - mp_maxrounds 30: Sets match to 30 rounds max.
- mp_halftime 1: Enables halftime switch after 15 rounds.
- mp_warmup_end: Immediately ends the warmup phase.
Additional commands:
- sv_infinite_ammo 2: Gives players unlimited ammo without reloading.
- sv_alltalk 1 & sv_deadtalk 1: Enables communication between all players, including dead players.
- mp_restart 2: Restarts the game after 2 seconds.
- echo lines: Prints messages in the console to confirm the config has loaded.
- mp_t_default_secondary: Gives Terrorists a silenced USP as a default sidearm.
- mp_t_default_primary “”: Removes the default rifle or SMG.
This config helps streamline your 1v1 matches, making sure the focus stays on fast, clean duels without distractions.
Now Open the console in-game and type your .cfg file name in my case its “1v1”:
exec 1v1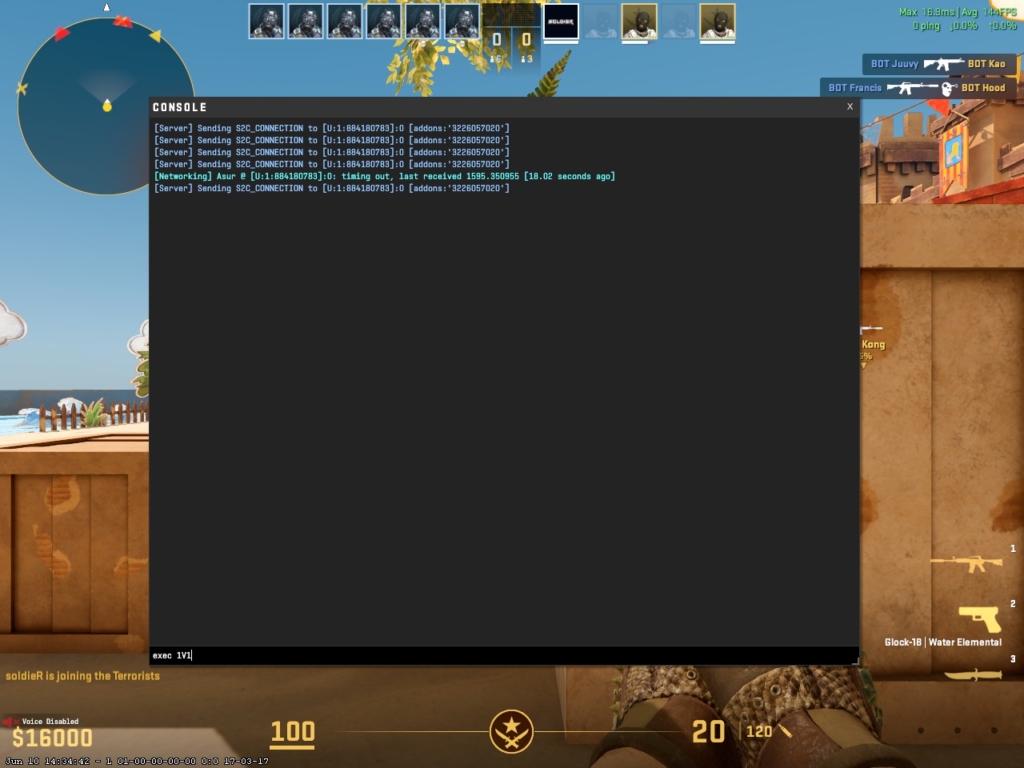
This will instantly apply all your pre-set configurations—no need to copy-paste the same commands every time.
Hosting your own 1v1 in CS2 is simple once you get the hang of it. With the right map, a few quick console commands, and a willing sparring partner, you can be up and running in minutes. Whether it’s casual fun or serious aim training, this setup ensures fast rounds, fair rules, and no bots to get in the way.
Let the duels begin and may the best player win.