
Best Settings for Dying Light: The Beast on PC (Max FPS + Stunning Visuals)
Dying Light: The Beast pushes the limits of zombie survival visuals, combining parkour freedom with next-gen lighting and realism. But all that beauty can be demanding on your GPU, especially during chaotic night sequences.
This guide breaks down every display and advanced video setting to help you get the best mix of performance, smoothness, and visual immersion, whether you’re rocking an RTX 3060, RTX 4070, or even a mid-range GPU.
Display Settings Explained
These core display settings control your resolution, FPS cap, and responsiveness. Tweaking them properly gives you smoother performance and less input lag.
| Setting | Recommended Value | Explanation |
|---|---|---|
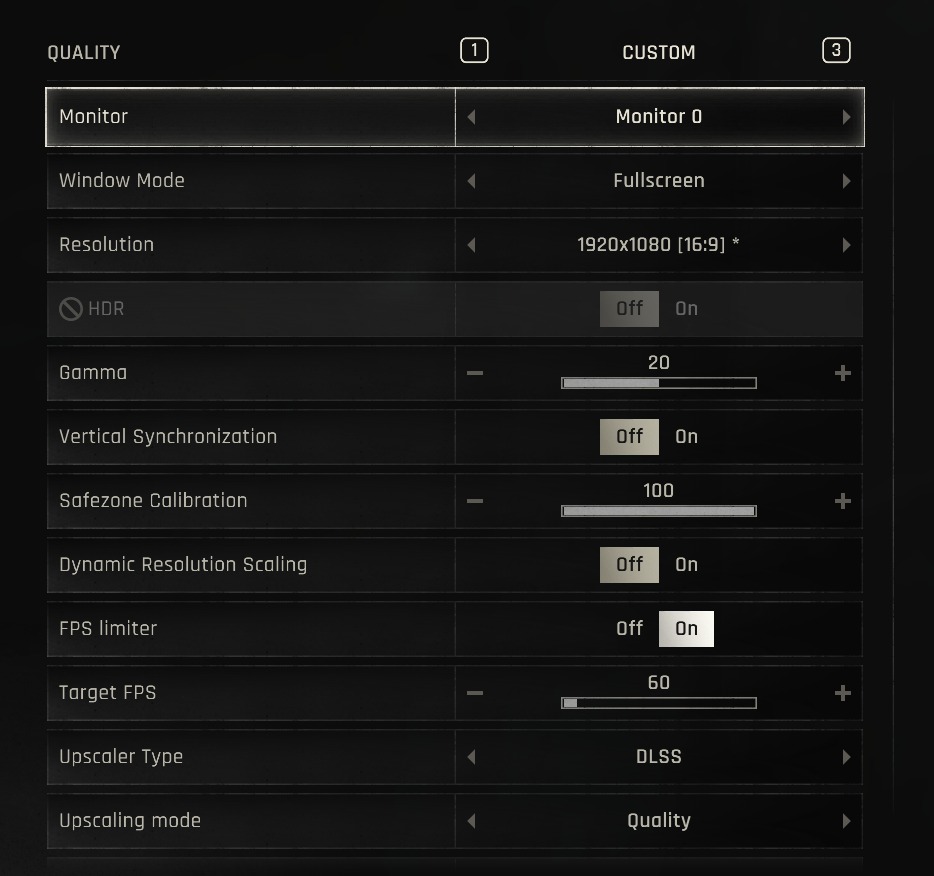
| Monitor | Primary Monitor | Make sure your main display is selected. |
| Window Mode | Fullscreen | Offers best performance and lowest latency. |
| Resolution | 1920×1080 (16:9) | Perfect balance of visuals and performance. |
| HDR | Off | Turn on only if you have an HDR-capable monitor. |
| Gamma | 20 | Adjusts brightness; tweak slightly for darker rooms. |
| Vertical Synchronization (VSync) | Off | Reduces input lag; allows your FPS to go beyond refresh rate. |
| Dynamic Resolution Scaling | On | Automatically adjusts resolution to maintain FPS target. |
| FPS Limiter | On | Keeps gameplay smooth; set your Target FPS to 60 or match your monitor. |
| Upscaler Type | DLSS (NVIDIA) | Uses AI upscaling to increase FPS while keeping image quality high. |
| Upscaling Mode | Quality | Balances sharpness and smooth performance. |
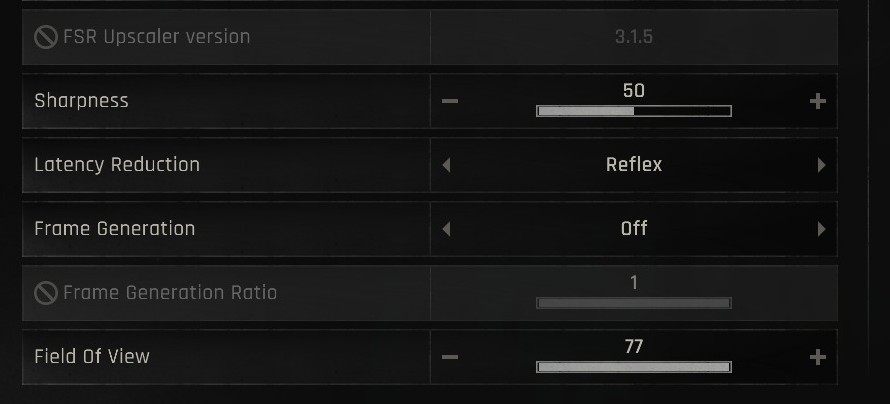
| Sharpness | 50 | Keeps image clear without harsh edges. |
| Latency Reduction | Reflex | Reduces input delay, great for combat responsiveness. |
| Frame Generation | Off | Adds latency; disable unless benchmarking. |
| Field of View (FOV) | 77–100 | Wider view helps situational awareness in parkour and combat. |
Advanced Video Settings Explained
This section is where you fine-tune the look and feel of Dying Light: The Beast. Below are detailed explanations like your “Glow” example, covering every feature.
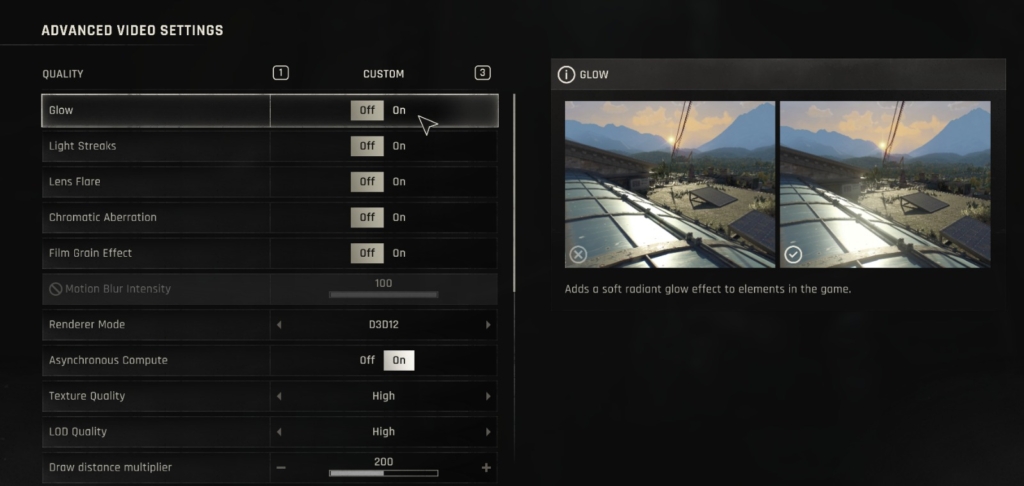
Glow
Adds a radiant light halo around reflective or bright objects.
Recommended: ON – Enhances realism and light diffusion, especially at sunset or night.
Screenshot Suggestion: Show “Glow On vs Off” comparison.
Light Streaks
Simulates long beams of light from bright sources.
Recommended: OFF – Looks cinematic but drains FPS, especially in open environments.
Lens Flare
Adds artificial light reflections similar to camera effects.
Recommended: OFF – Visual only; disable for cleaner gameplay visibility.
Chromatic Aberration
Creates a slight red/blue edge tint for cinematic visuals.
Recommended: OFF – Causes blurring on edges; best turned off for clarity.
Film Grain Effect
Applies a movie-like noise overlay for texture.
Recommended: OFF – Reduces clarity; keep off for a sharp, clean image.
Renderer Mode
Controls the rendering API used by your GPU.
Recommended: D3D12 (DirectX 12) – The most stable and optimized mode for modern hardware.
Asynchronous Compute
Allows GPU multitasking to improve performance and frame consistency.
Recommended: ON – Increases FPS on most modern NVIDIA and AMD GPUs.
Texture Quality
Determines how detailed surfaces like walls, clothing, and terrain appear.
Recommended: High – Looks crisp without huge VRAM load (6GB+ GPUs recommended).
LOD (Level of Detail) Quality
Controls how detailed distant objects are.
Recommended: High – Keeps the environment detailed without a heavy performance hit.
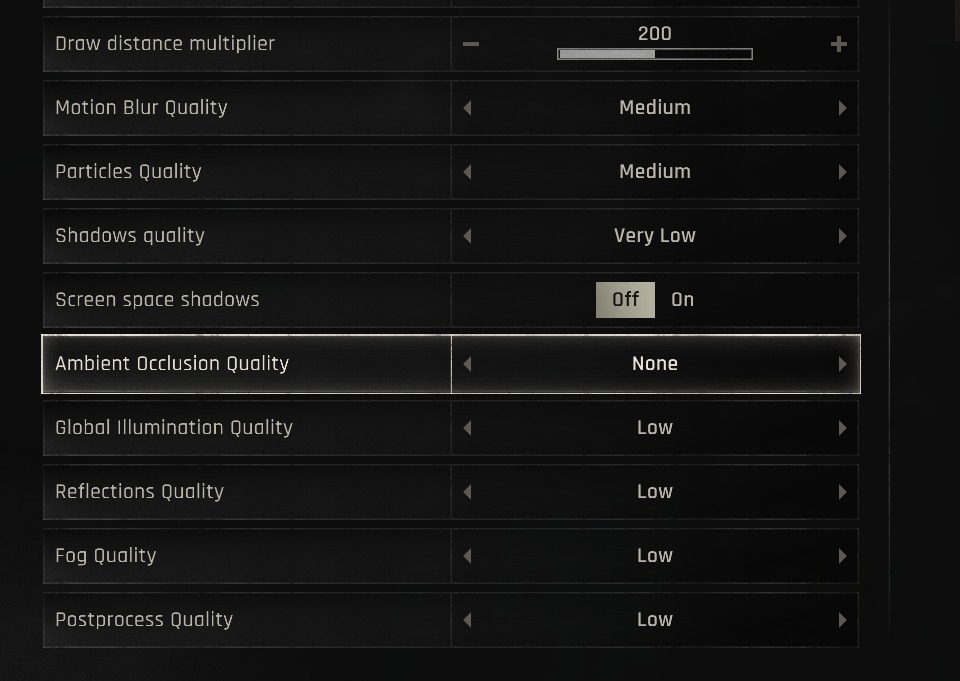
Draw Distance Multiplier
Defines how far the game renders world objects.
Recommended: 200 – Maximum immersion; slight FPS tradeoff that’s worth it.
Motion Blur Quality
Adds smooth motion effect when turning or sprinting.
Recommended: Medium or Off – Turn off for sharper movement and combat clarity.
Particles Quality
Controls effects like smoke, sparks, and debris.
Recommended: Medium – Balanced look without overwhelming your GPU.
Shadows Quality
Affects how dynamic and crisp shadows appear.
Recommended: Very Low – High impact on FPS; disabling gives big performance gain.
Screen Space Shadows
Adds soft shadows under small objects.
Recommended: OFF – Barely noticeable but affects FPS.
Ambient Occlusion Quality
Simulates shadow depth where light doesn’t reach (e.g., corners).
Recommended: None – Disable for higher performance.
Global Illumination Quality
Simulates realistic light bounce for better color and lighting depth.
Recommended: Low – Minimal difference visually, but much better FPS.
Reflections Quality
Determines how accurately reflective surfaces mirror the world.
Recommended: Low – Keeps realism while saving performance.
Fog Quality
Controls density and rendering of fog and volumetric mist.
Recommended: Low – Helps FPS in foggy outdoor areas.
Postprocess Quality
Applies image filters after rendering (like sharpening or tone mapping).
Recommended: Low – Keeps visuals clear and reduces unnecessary effects.
Performance Summary Table
| Setting Group | Best Value | FPS Impact |
|---|---|---|
| Display | Fullscreen, DLSS Quality, Reflex | Low |
| Shadows/Fog/AO | Very Low or Off | High |
| Textures/LOD | High | Moderate |
| Lighting Effects | Off | Medium |
| Upscaling (DLSS) | Quality | Low |
| Post-Processing | Low | Medium |
Bonus Optimization Tips
- Enable DLSS Quality Mode: Expect up to 30% more FPS with crisp image clarity.
- Disable Motion Blur, Film Grain, Chromatic Aberration: Cleaner visuals, smoother gameplay.
- Keep Drivers Updated: NVIDIA DLSS and Reflex improve with driver updates.
- Play from SSD: Faster load times and less stutter when streaming open-world assets.
- Monitor Refresh Rate: Always match your FPS target to your monitor’s Hz for maximum smoothness.
These Beast Mode settings for Dying Light: The Beast bring out the game’s stunning world design while keeping your FPS high and your gameplay fluid. Whether you’re exploring rooftops or fighting off infected at night, this setup ensures crystal-clear visuals and responsive performance.
Now step into the night with speed, smoothness, and pure Beast power

